Photo by Justin Morgan on Unsplash
Manage your Email with Filters (Gmail)
-Dani Evans
Google Support gives great simple directions for setting up Gmail Filters:
But, I like visuals and thought you might too.
I am sharing my guide for setting Gmail filters. Being a Google Workspace company and Google Partner, we use Google Meet exclusively. I use the record feature frequently for training so that I can refer back if needed. The Meet recordings are automatically sent to my work email. While helpful, I end up with several recordings a week in my inbox. I wanted to create a rule to have those emails go to a place of their own.
Create a New Filter:
Step 1: Open your Gmail!

Step 2: Click the down arrow in the “Search mail” box at the top.
/images/image15.png)
/images/image1.png)
![]()
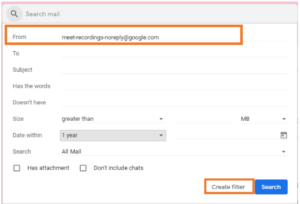
Step 3: Enter what you are searching for.
- I recommend checking to see if there is a specific sender you wish to isolate or specific phrasing and use the appropriate search field for such.
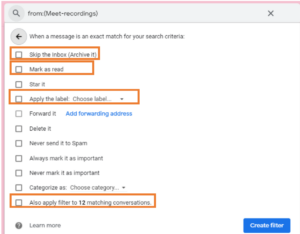
Step 4: Now decide how you want to filter the messages.
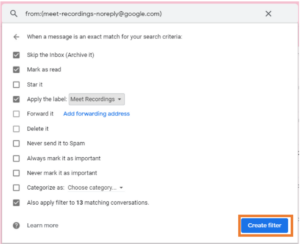
- I am going to select: Skip the Inbox, Mark as read, Apply the label: Choose Label, and apply filter to matching conversations.
/images/image17.png)
/images/image6.png)
/images/image23.png)
/images/image7.png)
/images/image13.png)
-
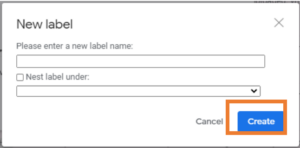
- Choose label > New label. Enter New label name and click Create.
/images/image16.png)
/images/image10.png)
-
- Choose label > Select from list if you currently have labels.
Step 5: Click Create filter.
- This filter will now sort all of my previous and future Meet recordings under the Meet Recordings Label.
/images/image20.png)
/images/image9.png)
To view or edit your filters:
Step 1: Go to the gear in the upper right-hand corner.
/images/image18.png)
/images/image4.png)

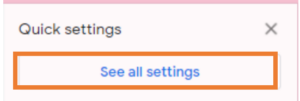
Step 2: Click “See all settings”.
/images/image22.png)
/images/image8.png)
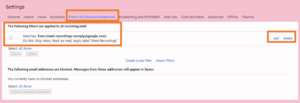
Step 3: Click the “Filters and Blocked Addresses” tab.
- Here you can view your filter list, edit or delete!
/images/image21.png)
Questions? Contact us via email: [email protected]

